Binary Data (GridFS)
Introduction
RESTHeart offers complete binary content management in a fully RESTful style. It’s possible to insert, read and delete huge binary files by leveraging the underlying GridFS store from MongoDB.
Once a file has been created in a bucket, only its json properties can updated. The binary content is immutable.
What’s GridFS?
GridFS is a specification for storing and retrieving files that exceed the BSON-document size limit of 16MB.
Instead of storing a file in a single document, GridFS divides a file into parts, or chunks, and stores each of those chunks as a separate document. By default GridFS limits chunk size to 255k. GridFS uses two collections to store files. One collection stores the file chunks, and the other stores file metadata.
When you query a GridFS store for a file, the driver or client will reassemble the chunks as needed. You can perform range queries on files stored through GridFS. You also can access information from arbitrary sections of files, which allows you to “skip” into the middle of a video or audio file.
GridFS is useful not only for storing files that exceed 16MB but also for storing any files for which you want access without having to load the entire file into memory.
Specifications
RESTHeart is committed to adhere to Internet standards. To successfully upload files, RESTHeart’s clients must strictly follow the Internet Media Type multipart/form-data as defined in RFC 7578.
The multipart/form-data specification allow a form to upload multiple files at the same time. RESTHeart prohibits this: while it’s possible to POST / PUT several different non-binary parts for each file, it’s mandatory to upload one single binary file per each POST / PUT request. This limitation is necessary so that is possible to univocally relate all the optional parts to a single file.
Using curl
Let’s use curl to upload a PNG image named “picture.png”.
What’s curl?
curl is an open source command line tool and library for transferring data with URL syntax. It’s installed by default on all Linux distributions, Mac OSX and most Unix systems. A Windows version is also available.
In this example we assume RESTHeart running on localhost (127.0.0.1), port 8080, but of course your setup can be different.
POST a binary file with curl
1) Create a database, if none exists yet:
$ curl -u user:password -X PUT -H "Content-Type: application/json" 127.0.0.1:8080/testdb
2) Create the collection for hosting files. It must end with .files to
mark this as a special collection for files:
curl -v -u user:password -X PUT -H "Content-Type: application/json" 127.0.0.1:8080/testdb/mybucket.files
3) POST the file. Set the file parameter to the actual binary file, using the =@ curl syntax.
curl -v -u user:password -X POST -F "file=@picture.png" 127.0.0.1:8080/testdb/mybucket.files
You’ll see an HTTP response header like below, returning a 201 Created:
*   Trying 127.0.0.1...
* TCP_NODELAY set
* Connected to 127.0.0.1 (127.0.0.1) port 8080 (#0)
* Server auth using Basic with user 'admin'
> PUT /testdb/mybucket.files/picture.png HTTP/1.1
> Host: 127.0.0.1:8080
> Authorization: Basic YWRtaW46Y2hhbmdlaXQ=
> User-Agent: curl/7.54.0
> Accept: */*
> Content-Length: 221176
> Expect: 100-continue
> Content-Type: multipart/form-data; boundary=------------------------d2d164f1076f1b8b
>
< HTTP/1.1 100 Continue
< Content-Length: 0
< HTTP/1.1 201 Created
< X-Powered-By: restheart.org
< Auth-Token-Location: /_authtokens/admin
< Access-Control-Expose-Headers: Location, ETag, Auth-Token, Auth-Token-Valid-Until, Auth-Token-Location, X-Powered-By
< Date: Sun, 08 Apr 2018 21:26:14 GMT
< Auth-Token: 4tplfhpu5uy5hq1ih4r2tg2f1b9kygp4sypr1oe7yvr3fby43d
< Connection: keep-alive
< Access-Control-Allow-Origin: *
< Auth-Token-Valid-Until: 2018-04-08T21:41:13.951Z
< Access-Control-Allow-Credentials: true
< Content-Length: 0
< Content-Type: application/json
<
* Connection #0 to host 127.0.0.1 left intact
The following line in the response header gives the file’s location:
Location: http://127.0.0.1:8080/testdb/mybucket.files/552e1e89e4b019b2fa790f3f
Note that the location contains the object ID automatically generated by MongoDB (see the string “552e1e89e4b019b2fa790f3f” at the end of the above URL). This is a unique identifier and it’s convenient in many situation, but it’s not always desirable. In many case it would be better to explicitly name the resource with something more readable and meaningful. To set the resource name it is necessary to upload the file by using the PUT verb instead of POST.
Uploading files with PUT
By W3C specifications the POST semantic delegates to the owning resource
the decision on how to handle the creation or the owned resource. In the
previous examples, the mybucket.files owner by default assigned to new
files a resource name coming from MongoDB. If we want to decide for a
meaningful name then we just need to send a PUT, like this:
curl -v -u user:password -X PUT -F "file=@picture.png" 127.0.0.1:8080/testdb/mybucket.files/picture.png
If we GET the resulting resource, here is the full HTTP response:
HTTP/1.1 200 OK
Access-Control-Allow-Credentials: true
Access-Control-Allow-Origin: *
Access-Control-Expose-Headers: Location, ETag, Auth-Token, Auth-Token-Valid-Until, Auth-Token-Location, X-Powered-By
Auth-Token: 4tplfhpu5uy5hq1ih4r2tg2f1b9kygp4sypr1oe7yvr3fby43d
Auth-Token-Location: /_authtokens/admin
Auth-Token-Valid-Until: 2018-04-08T21:41:33.169Z
Connection: keep-alive
Content-Encoding: gzip
Content-Length: 249
Content-Type: application/json
Date: Sun, 08 Apr 2018 21:26:33 GMT
ETag: 5aca88f5634459000711d931
X-Powered-By: restheart.org
{
    "_id": "picture.png",
    "_links": {
        "rh:data": {
            "href": "/db/mybucket.files/picture.png/binary"
        }
    },
    "chunkSize": 261120,
    "filename": "file",
    "length": {
        "$numberLong": "220973"
    },
    "md5": "0f289f7447e9db7af996e112e8fe3de1",
    "metadata": {
        "_etag": {
            "$oid": "5aca88f5634459000711d931"
        },
        "contentType": "image/png"
    },
    "uploadDate": {
        "$date": 1523222774054
    }
}
Note that in this case the resource shows a much nicer representation:
127.0.0.1:8080/testdb/mybucket.files/picture.png
Which is easier to read and link than the automatically generated name (but requires a little more work on your side).
If you want to better understand the theoretical difference between POST and PUT verbs in terms of the Hypertext Transfer Protocol – HTTP/1.1, this blog post might be useful: RESTful API memo: PUT and POST differences.
The “properties” part
It’s possible to add an optional form data part to the request by using the properties field name. The content of this field is automatically parsed as JSON data, so it must be valid JSON:
$ curl -v -u user:password -X POST -F 'properties={"name":"Maurizio", "surname":"Turatti"}' -F "file=@picture.png" 127.0.0.1:8080/testdb/mybucket.files
The JSON will be merged into the file document (look at the end of the code block):
Expand source
TTP/1.1 200 OK
Access-Control-Allow-Credentials: true
Access-Control-Allow-Origin: *
Access-Control-Expose-Headers: Location, ETag, Auth-Token, Auth-Token-Valid-Until, Auth-Token-Location, X-Powered-By
Auth-Token: 4tplfhpu5uy5hq1ih4r2tg2f1b9kygp4sypr1oe7yvr3fby43d
Auth-Token-Location: /_authtokens/admin
Auth-Token-Valid-Until: 2018-04-08T21:44:08.928Z
Connection: keep-alive
Content-Encoding: gzip
Content-Length: 270
Content-Type: application/json
Date: Sun, 08 Apr 2018 21:29:08 GMT
ETag: 5aca899f634459000711d933
X-Powered-By: restheart.org

{
    "_id": {
        "$oid": "552e1e89e4b019b2fa790f3f"
    },
    "_links": {
        "rh:data": {
            "href": "/db/mybucket.files/552e1e89e4b019b2fa790f3f/binary"
        }
    },
    "chunkSize": 261120,
    "filename": "file",
    "length": {
        "$numberLong": "220973"
    },
    "md5": "0f289f7447e9db7af996e112e8fe3de1",
    "metadata": {
        "_etag": {
            "$oid": "5aca899f634459000711d933"
        },
        "contentType": "image/png",
        "name": "Maurizio",
        "surname": "Turatti"
    },
    "uploadDate": {
        "$date": 1523222943247
    }
}
If the “properties” part contains a “filename” this sets the filename.
then passing the following part
'properties={"filename":"different_filename.png"}'
GET a binary file with curl
GET the representation (metadata only) for the newly created file:
$ curl -u user:password http://127.0.0.1:8080/testdb/mybucket.files/552e1e89e4b019b2fa790f3f
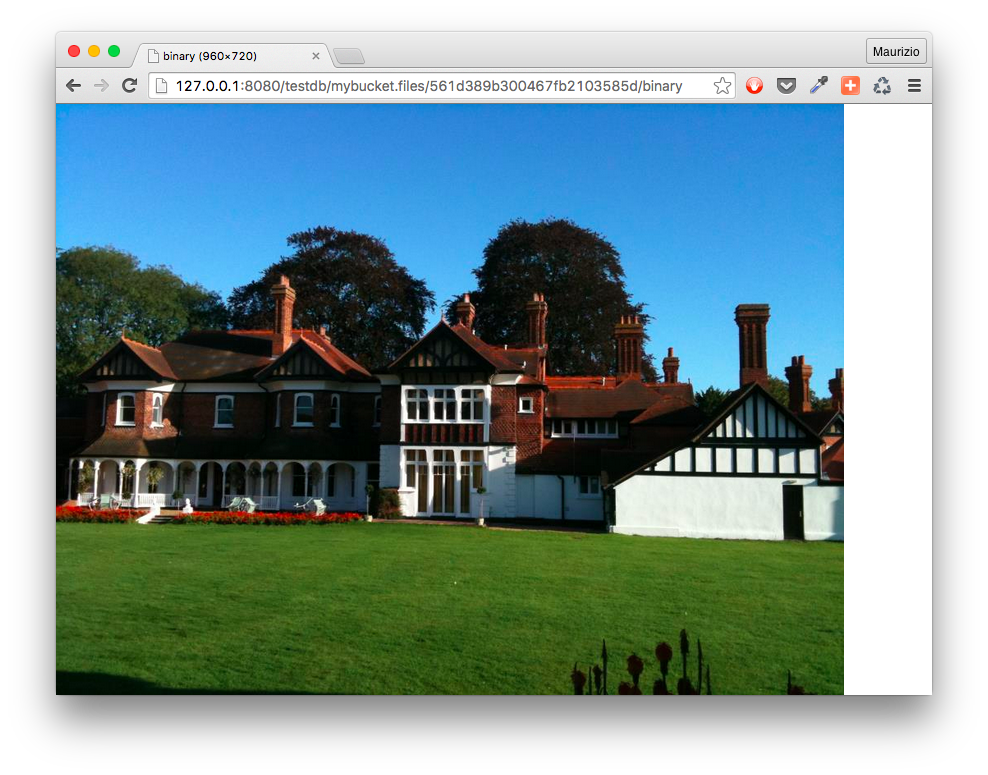
Appending `/binary` at the end of the above URL makes possible to
GET the binary content stored into GridFS:
$ curl -u user:password http://127.0.0.1:8080/testdb/mybucket.files/552e1e89e4b019b2fa790f3f/binary
If we paste this URL to a browser’s address bar then the image is displayed. This allows RESTHeart to serve as a very basic but powerful digital asset management system.
 {width=”800”}
As explained, the underlying storage mechanism is MongoDB’s GridFS, which is an extremely powerful abstraction over a filesystem, without any file size limits.
When should I use GridFS?
For documents in a MongoDB collection, you should always use GridFS for storing files larger than 16 MB.
In some situations, storing large files may be more efficient in a MongoDB database than on a system-level filesystem.
- If your filesystem limits the number of files in a directory, you can use GridFS to store as many files as needed.
- When you want to keep your files and metadata automatically synced and deployed across a number of systems and facilities. When using geographically distributed replica sets MongoDB can distribute files and their metadata automatically to a number of mongod instances and facilities.
- When you want to access information from portions of large files without having to load whole files into memory, you can use GridFS to recall sections of files without reading the entire file into memory.
Using httpie
While curl does its job, instead we love httpie. This little Python program allows to indent and colorize the output of HTTP responses, making it more readable than curl.
Let’s say we already have a db called testdb, exactly as with curl,
first create the .files collection, if it doesn’t exist yet:
http -a user:password -j PUT 127.0.0.1:8080/testdb/mybucket.files
Then POST a file named “picture.png”:
http -a user:password -f POST 127.0.0.1:8080/testdb/mybucket.files file@picture.png;filename=picture.png
For example, to upload a file named “mypicture.png” with PUT:
http -a user:password -f PUT 127.0.0.1:8080/testdb/mybucket.files/mypicture.png file@"~/Desktop/mypicture.png" properties='{"author":"Maurizio Turatti"}'